Sunday, December 22, 2013

Roasted Pepper on Sourdough bread with cheese

A little history is in order. Roasted peppers! OMG. My dad used to come home with all these red peppers and rain or shine mostly rain...I remember and he would roast them peppers on those old round shallow grills in the garage till they were all done. Smoke all over the place and then as they were done drop them into a paper bag. I have always done the paper bag thing till it dawned on me why ....the paper bag drew off the oil and stuff from the roasted peppers! Once the peppers were cool you peel off the skin and drop them into mason jars with some olive oil, chopped garlic, a bit of salt and fresh parsley.

 
You will never taste anything as special as home roasted peppers. I have had jarred and home done and believe me there is no contest!
 
Coupled with sourdough bread from the previous posts and some home made cheese, I used my rosemary cheese..(future post)...you can have the most heavenly appetizers you ever had. Just pile your slice bread with peppers and cheese and toast for about 15 min.
 
This is what we had tonight. Like I have said before, I have posted what I have made. The couple of days before I really haven't made anything other than repeats of what I have posted before. As in tonight the main dish is fall off the bone ribs. Since I didn't think you wanted repeats I haven't posted ever day when I made the same thing. I do hope you will keep posted and as I make things I will post them accordingly.

If you have any questions or comments please leave them below...I would love to hear from you!
 
Enjoy!
 
Steph


Friday, December 20, 2013

Merry Christmas

I just wanted to post a note and wish every one Merry Christmas! The reason you haven't heard from me is tis the season for work parties and such so not too much has been making in the house. I will be back to cooking again so keep posted. Just so you know, I post as I make so these recipes you see is what we are having. So in a parting note today. Happy Holidays!

Enjoy!
Steph

Wednesday, December 18, 2013

Pasta and Goodness-Veal and Sausage

As I have mentioned before, it's all about saving money and using what you have. I remember weekends at my Nana's and baking with half the ingredients that the recipe called for. We would either substitute or leave out what she didn't have on hand. It was always an adventure and was always good. Even if it didn't look too good! But hey, it was fun. I have so many memories of those times and I have always cooked the same way. So if you don't have all the ingredients to make a traditional dish make one of your own! Here I made what I had on hand and it was very good. More than good it was great! Let's take a step back and think about the money saving thing. Even though Italian cooking, for maybe you, is something that you may think is exact (I am full blood Italian),  rules can be broken. Make it your own is what I say. So here is what I made and let me tell you it is really good. You can change the meats or omit and put in other things, it doesn't matter. The exercise for this is to make what you can with what you have on hand and satisfy your family. Mushrooms, peppers (easy on the peppers, they tend to dominate the taste of what ever you put them in unless of course if you use roasted red peppers)  sausage, meat of any kind. The combinations are endless. So, back to what I made. I had a package of veal, and a package of Primo sausage and half pound mozzarella.

 I used penna pasta which is my fav but you can use what ever you have on hand. That is the purpose...use what you have.
 
Let me start with a basic sort of marinara sauce. Chop up a couple clove of garlic, some onion, I prefer crushed tomato (see pic), fresh or dried parsley, basil, salt, pepper and optional grated cheese ( I use my home made cheese-only if you ask me to blog that!)

 
Fry up the garlic, onion in some olive oil, add the meat till browned, add tomato and herbs. dash or two of salt and pepper and simmer for about 40 minutes in your cooker.


The veal which I took out to brown the sausage.
We are super cooking here. You can do the long cook way and wait for about two hours if you wish in a regular pot. Cook pasta,

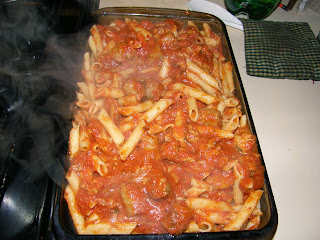
mix with some of your sauce and add to dish with cooked pasta and topped with mozzarella bake in oven 375 degrees for about 20 minutes or until cheese is melted.


Finish up with some of your homemade bread
toasted and wow.
A nice hearty meal to feed the masses!
 
 
Enjoy!
 
Steph

Saturday, December 14, 2013

Cream of Broccoli Soup

Well in my household not everyone is fond of any green food. But I just love broccoli and cream of broccoli soup so if your household is the same, here is a great tip to make what you like and still feed the rest of the family! Most of your cream soups are chicken soup base. Cream of broccoli, cauliflower, chicken, etc. Sooooo, since it is soup weather make yourself a nice pot of chicken soup but before you add your pasta or what ever you plan on giving your soup it's umph, i.e., dumplings, pasta, rice or what ever, you can use some of that golden broth to make a spot of soup you like that the rest of the family wouldn't care for. So in this instance I made cream of broccoli.  Let's begin. This is what you need:
 
About 10-12 oz Broccoli
1 tablespoon butter or margarine
1 large clove of garlic
three tablespoon flour
1 cup milk
2 cups of chicken stock
salt, pepper, optional turmeric to taste
 
Chop up your broccoli and mince your garlic and put in a small sauce pan with your butter or margarine and sauté for about 10 minutes. Add your flour and stir on medium heat till completely combined. Add your milk while stirring till it is smooth. Add your chicken stock from the pot of chicken soup you are making on the other burner.
I didn't bother straining out the carrots and stuff. I just added what ever I scooped out, but that is my preference. You can strain out the veggies for just the stock. Add your salt, pepper and optional turmeric to taste.  Simmer till nice and thick and serve yourself up! You can also add a few chunks of your homemade American cheese if you like too for a little cheesy taste!
 
Now if you are lucky and your entire family likes broccoli you can make a bigger pot and use the entire chicken stock you made including the chicken for a great cream of broccoli and chicken soup! Just increase your flour, broccoli and milk, etc.
 
During the harvest season I frequent my favorite Amish farm and get great deals on heads of broccoli and cauliflower really cheap. I blanch them and then spread them on cookie sheets and freeze. When totally frozen I put them in bags so I can take out just what I need without having to defrost the entire bag. Great hint if you have a separate freezer in your house or you can do smaller batches in a regular freezer. For me, a dollar or so a head stretches my food money to the max and makes great soup or side!
 
Let me know if you have any questions or comments below. I will be happy to answer any. Keep warm this winter and as always...
 
 
Enjoy!
 
Steph

Thursday, December 12, 2013

Ham and Split Pea Soup

Remember that home cured ham I made in a previous post? Well here is a continuation of the saga of the ham! Since we want to save money here and waste nothing, we have a perfectly good bone with all kinds of bits of ham hanging on it. We sliced and picked that ham to death and just when you think there is nothing left...there is split pea soup! And since I smoked the ham, this soup has a soft smoky flavor to it you just can't get in a can! Ohhh such an easy, delicious and cheap soup! So easy that I did it all in a crock pot so there is no mess, fuss or prep work involved. Go to work, come home and eat! All you need is this:

One Ham bone
1 bag of split peas
Optional bay leaf and rosemary
Pepper
Optional turmeric
 
Not a lot of ingredients but very wholesome, good for you and CHEAP! So the night before, put your ham bone in the crockpot, cover with water and add your bay leaf. You may want to toss in a sprig of rosemary or a dash of dried. I love rosemary!  Put on low and go to bed. ZZZZZZZZZZZZZZZZZZZZZZZZ *yawn* Morning! Give it a stir and add your split peas and go to work. Tick tock, tick tock... Hi honey I'm home! Give a stir and remove the bones, pepper and turmeric to taste (Do not add salt! There is enough in the ham bone!) serve with bread and a salad and tell your family you slaved at the stove to bring them the best soup they ever had! Hmmm that subtle smoky flavor combined with the ham and peas is just the best thing you ever had! Seconds anyone?
You have to admit, we got a lot out of that on sale pork picnic! Sliced ham, ham sandwiches, ham salad and now soup! Can't tell you how many meals we got out of it. All for about $8! 

 
A recap on all this turmeric. If you have been following my blog you know the benefits of this spice. If not give it a +Google or read back about what I wrote about it. You will not believe how much this can help you. I will tell you one little benefit that I have found. It takes the gas out of Cole slaw for me! Can't wait to make chili again. It is also a very strong anti-inflammatory agent and you need to add black pepper with it to aid the body's absorption of the spice among other things. Now the disclaimer as before. Everyone is different and you may not get the same results. The good side is there's not much on side effects so give it a try. It can only help you and not hurt you. It is definitely the undiscovered spice. I put it in almost everything I make and I know it has benefited me and I like to share. If you have had good results with it, please let us know below in comments. I am sure everyone that reads this blog would like to hear from others and read your results of using turmeric.
 
 
Enjoy!
 
Steph


Wednesday, December 11, 2013

Homemade Pita Bread

Every once in a while I get a hankering for Greek Gyro. To make that great sandwich you need pita bread! In this blog I am only  posting the pita part. The rest is for another blog. Any way, these are relatively easy and one of the few recipes I use store bought yeast for. Another thing, for my sandwiches I like them big but you can make smaller ones. What you need is:

1 tablespoon active dry yeast
1 tablespoon of sugar
1/2 cup of warm water
4 cups of flour
2 teaspoons of salt
1 cup of warm water
1 tablespoon of olive oil
 
Mix the sugar, 1/2 cup of water and yeast together and let get bubbly for about 10 min or so.  Mix your salt in the rest of your water. In a large bowl place your flour and make a well. Add your yeast mixture and the water mixture and form a dough, add the olive oil and knead till well mix.
Let rise about an hour or two till doubled in size.
Knead for a little while and form into balls a little bit larger than golf balls and roll out flat to about 1/4 in. or 3/8 in. high and place on lightly greased cookie sheets.

As I said I like them larger so I use more dough and they are a bit fatter and take a minute or two more of cooking time. Poke a few holes and let rest for about 15 min. or so while your oven heats up to 350 degrees. With the rack as low as it goes bake for about 3 min. each side till just barely golden. Remove and let cool.

 
I have used this recipe for years with great success. I hope you do too. If you have any questions or comments please leave them below. I would be happy to hear from you.
 
 
Enjoy!
 
Steph

Tuesday, December 10, 2013

Rosemary, Sage, Cheese Garlic Sourdough Bread

All this snow inspires me for more bread making. When my children were little and they closed the schools due to snow I would walk to the corner store and buy some lunch meat and chips and come home and start my dough. I would make my own hoagie (sub) rolls and make fresh sandwiches! It became a tradition here and they not only looked forward to no school but to the fresh bread I would make. While everyone else was out stripping the store shelves of bread we were making our own! Maybe you can start your own snow day tradition! I have already made sourdough bread here but this is a little different as I chopped up fresh herbs and added some of my homemade cheese and a dash or two of garlic powder to the mix but you can use dry herbs and use what cheese you have handy. We are going to essentially use the same recipe from Let's Make Sourdough Bread! blog but substitute the shortening/lard with butter, add tablespoon or so of fresh rosemary and sage with a dash of garlic and a 1/4 cup of crumbled cheese. Here is the original recipe for the above blog link.

Basic Sourdough Bread

 
3 cups of starter
4 cups of flour to start +2-3 cups
3 tablespoon lard or shortening
1 tablespoon salt
1 cup of scalded and cooled milk or 1 cup of room temperature whey from making yogurt.
(previous blog)


 Like I said I used my homemade cheese but you could use Romano, or Colby, Cheddar or the like. Knead into the dough before baking. Bake as usual for a great artesian bread you make yourself! Toast slices topped with roasted peppers and more cheese. Or you could just use it as any other bread and make a sandwich! Make an olive oil dip with herbs and dip away!

You can see the bits of chees and herbs. Such a wonderful taste and crunchiness.

So in closing, Make a snow event into a homemade bread event!

Enjoy!

Steph
www.webdees.com
www.etsy.com/shop/deesshoppe

Saturday, December 7, 2013

Potato Chip Cookies

Ahhh the holidays are upon us! Time to bake cookies! Ya baby! I got this recipe back in the 80's. So simple non-descript but very, very good. With it's unusual ingredient they are so good! No special form or rolling out nor special equipment. Very basic and easy enough to have the kids making them! Well lets get on with it!
 
2 sticks of butter
1/2 cup sugar
1/2 cup of crushed potato chips (regular)
2 cups flour
1 tablespoon of 10X sugar
1 teaspoon vanilla
1 teaspoon baking powder
1/2 teaspoon baking soda

(The Vanilla is my homemade!)
 
Cream sugar and butter and add all the other ingredients.
Grease or Pam cookie sheet and pre-heat oven 350 degrees.

Form into a small ball and flatten with your fingers. Bake 350 degrees 15 minutes or until golden.
Cool and keep in a sealed container...provided you don't eat them all! You would never believe they have potato chips in them! Easy, quick and so yummy!
 
Enjoy!
 
Steph
 

Sourdough Starter Pancakes

Well I am back to the sourdough starter. Your living, growing starter can be used for a multitude of things. You don't have to go out and buy this to make that or buy that to make this. The store has you running all over the place to cook different things. Pizza crust mix, pancake mix, cake mix, bread mix...sheesh! All you need is your sourdough starter and its a renewable source so you always have it on hand! Now you may think I am making all this stuff up for this blog but you have been seeing what I make for me and my family most days. So I live this lifestyle and save myself money and I wanted to share it with others. Therefore, I started this blog! Ok enough of all that let's get back to what this is about! What you need is this:
 
3 cups sourdough starter
2 tablespoon sugar
2 teaspoon baking powder
2 tablespoon of veg. oil
dash of salt
 
Sounds simple doesn't it? Just heat up your pan and make like you would normally. I make my own grape jam from grapes from my vine and I made a glorious syrup with it out of Karo corn syrup and the jam cooked till combined. Yummy!
So you see, you don't need pancake mix at all.  
 
Enjoy!
 
Steph
www.etsy.com/shop/deesshoppe

Friday, December 6, 2013

Pork Stoup with Barley

With winter setting in comfort food is always welcomed. This is a hearty dish which can be made with pork bones. I had picked up a whole bone in pork tenderloin for $1..68 a pound. Great deal. After cutting out the tenderloin which I made Canadian bacon out of I used the bones to make this. You can also use pork neck bones which you can get on the cheap. Save you lots of money and make a delicious stoup that is full of goodness too! You pretty much make this like any other soup with some variations.
 
Pork Neck bones or any kind really
3 large carrots
1/2 stalk celery
1 medium onion
2 small potatoes
 several sprigs of parsley or dry
optional fresh sprig rosemary
1/2 cup barley
Salt and Pepper to taste
Optional Turmeric
 
Cover your bones with water and cook till tender skimming off any gunk that may accumulate on the top like we did with the chicken soup.
Chop your carrots, celery, potatoes and onions in the mean time. Remove the bones to cool
and add your veggies, chopped parsley.
Cook till veggies are done and strip the bones of any meat and add to your pot.
Add your optional rosemary (love this stuff!) and about 1/2 cup pearl barley.

Cook away till barley is done and your stoup thickens. Add salt, pepper and turmeric to taste. There you have it. Thick, yummy and cheap meal.

Add a salad and some garlic bread and you have a great meal for a cold day.
You can make a stoup or soup with almost any kind of meat and bones so you really don't have to stick with traditional stuff. If you catch a good sale you can make a big pot of goodness for little money.
 
Enjoy!
 
Steph

Thursday, December 5, 2013

Chocolate Coffee Pumpkin Angel Food Cake!

This is another cake rendition using boxed Angel food cake mix! Truly a Coffee cake with real coffee! You will need:

1 Box Angel Food Cake Mix
1 tablespoon Cinnamon
1 teaspoon ground Ginger
1/4 teaspoon ground Clove
2 heaping tablespoon instant coffee
2 heaping tablespoon Baking Cocoa Unsweetened Powder
2 cup Pumpkin Puree can or fresh
1/2 cup milk
Two handfuls of semi-sweet chocolate chips
Optional nuts
 
Mix all your ingredients together with exception of the chocolate chips.
 I used Hershey special dark chips. You can use which ever kind you want really. Ready your pan.
Grease or spray with Pam. Pre-heat oven 350 degrees.
Fold in chocolate chips and optional nuts and pour into pan. You can use a tube pan as here or a bunt pan. Bake for about 40 minutes or until knife comes out clean.
 
This is so decadent! I have made this several times and it is always a crowd pleaser! Bet you can't have just one piece!
 
Enjoy
 
Steph