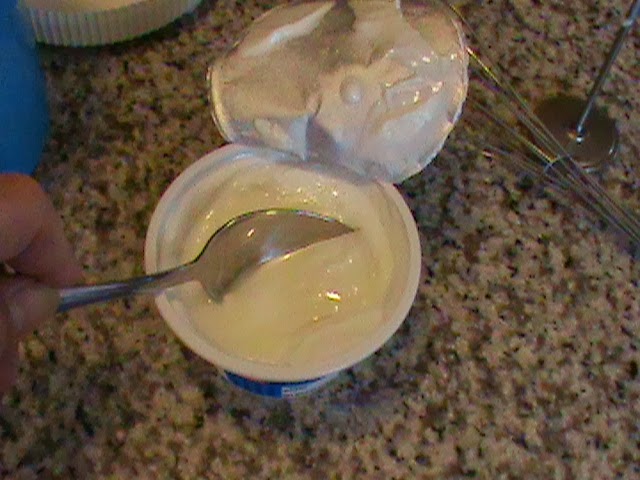
Tuesday, November 12, 2013

Let's Make Sourdough Bread!

If you have been following my blog we previously made sourdough starter. You should have a viable starter by now and have fed it a couple of times. If you don't have enough yet keep feeding 1 cup of water and 1 cup of flour for a few days till you do.
It should be nice and bubbly.
Gather your ingredient and your pot. If you don't have a Dutch oven I guess you can use any pot that you can safely put in the oven or you can just form on a pan.
My dutch oven is an All-clad. It has a genuine dutch oven lid. Did you know that that lip is to pile coals from the campfire to bake what you put in the pot? It's made so when you lift the lid the coals don't fall into your food! +Amazon.com carries them too. Ok enough about the pot!
 
3 cups of starter
4 cups of flour to start +2-3 cups
3 tablespoon lard or shortening
1 tablespoon salt
1 cup of scalded and cooled milk or 1 cup of room temperature whey from making yogurt.
(previous blog)
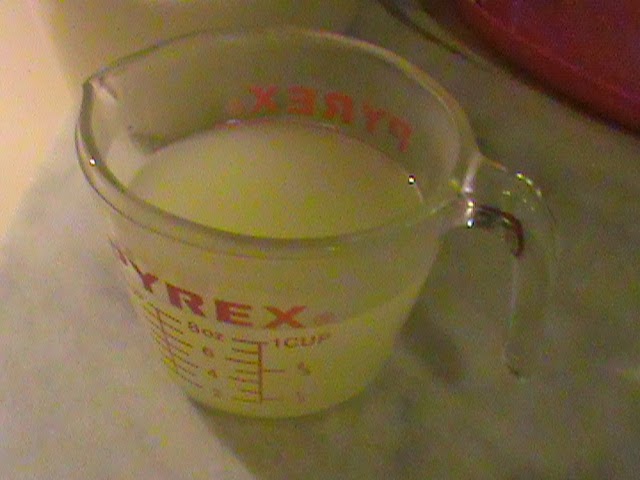
Told you to save it! Yes! You can use your whey and not waste a thing!


Mix your ingredients together with just 4 cups of flour.
Let rest about an hour or so. Make a well with the rest of your flour, about 2-3 cups, and add your dough. Start folding and kneading the flour into your dough till you get a smooth dough that doesn't stick to your fingers.


Place in your Dutch oven.
Cover and place in cold oven and let rise overnight. I started mine the night before and baked it in the morning before work. That puppy will rise and probably lift the lid off! Mine did! Don't touch it! It will fall! Start up your oven at 375 degrees for about an hour. If you are using a pan you may want to add a little more flour to make a stiffer dough as this tends to spread out without anything to contain it. Make a nice round and place in cold oven to let rise overnight. You may also want to divide on to two pans. Take it from experience. It loves to spread!
Take the lid off and let the top get golden brown then remove and cool. Your bread will pull from the sides and then you can upend the pot to let it cool before slicing.

Look at all those bubble holes! Perfect! Use for toast, sandwiches, Paninis, top with fresh roasted red peppers topped with provolone or mozzarella cheese and toast for a great appetizer. I made some of that with this and it was yummy!

There are so many uses for sourdough starter. Pancakes, muffins, pizza dough. Here is a good site to start with http://sourdough.com/recipes. There are many other sites. Just +Google Search Engine for other sites.

Please let me know how you make out. You can leave a comment or questions below. I would love to hear from you!

Enjoy!

Steph
www.webdees.com
www.etsy.com/shop/deesshoppe


Monday, November 11, 2013

Homemade Greek Yogurt!

Homemade Greek Yogurt you can make at home with equipment you probably already have! Does this all look familiar?
This is your high tech equipment! LOL Bet you didn't think you had your own yogurt making equipment! So here is what you do......
Take about 1/2 gal milk heat to 170 - 180 degrees...that would be a little after it starts to bubble around the sides. Don't scorch it! Let cool to 105 degrees. 
Now add your starter. If you eat a lot of yogurt you will only have to buy this once.


Three heaping spoonful's ought to do it! You can eat the rest now.
Mix really well and put the lid on. Place in cooler and wrap the heating pad around it. Turn on the heating pad to medium and close lid.
Simple huh? Let it do it's thing and come back about 12 hours later. You can start this in the morning before work and it should be ready after you get home, made dinner and done cleaning up. You will need a colander, bowl and some sort of fine cloth as a linen dinner napkin, cheese cloth, muslin  +Walmart sewing department sells muslin cheap and its washable and re-useable! Or an old clean t-shirt will do. Line the colander with your cloth, place over the bowl and dump the yogurt in. Your yogurt will be a little soupy but that is ok, we want to drain some of the whey off. Gather the corners, tie to long mixing spoon or chop stick or I hang mine from the cabinet handle with twine or yarn and suspend over the bowl. Let drain about an hour and you are done. Take down and transfer to a container for storage in the fridge. Oh and save what you drained off. It is whey. If you are following this blog you will need it for what is coming up!
Chill and you are all set. When you get down to the last couple of spoonfuls repeat the process. You will never have to buy yogurt again! Keep refrigerated.
 
Add fresh fruit or canned for a homemade delicious treat! Add some frozen berries and blend for a smoothie! Use instead of sour cream on your potato or tacos! My favorite is on fried chicken. Years ago I was fed lunch by a Greek family and they made their own yogurt. Lunch was fried chicken with yogurt. Don't knock it till you try it! It was the most delicious thing I ever tasted and I have remembered it from over 35 years ago!
 
You will save money and you can make any flavor you want. Most of all you did it all by yourself! Go ahead and boast! No fancy yogurt maker, no fancy equipment! Another thing did you know that you can use yogurt in making different kinds of cheese? It has enzymes needed to make different kinds of cheese! That is another blog! 
 
Let me know how you make out or you can leave a comment or question below. I would love to hear from you!
 
Enjoy!
 
Steph


Saturday, November 9, 2013

Sourdough Starter

Sourdough starter...a living, breathing thing that makes the best thing to replace store bought yeast! So renewable and sustainable for an indefinite amount of time as long as you feed it and nurture it regularly. There are starters still being used today from the 1800's. Awesome huh? But how do you start this life? There are many ways which you can find on the net. Basically it's water and flour and you need to catch some wild yeast from the air. I have mentioned wild yeast in previous posts. It's what starts the process to make sauerkraut. It is on most fruit and veggies. It's that dull finish on grapes and plums. An easy way is to take a cup of water and flour, mix, then toss in a whole grape or two, cover and wait 24 hours. You shouldn't wash the grapes first or you will defeat your purpose by washing off the yeast. You should see some bubbling going on after that time. What you have now is a starter. Feed it equal parts flour and water every day or so to keep it growing. I also use leftover whey from making cheese.
 I store mine in the fridge to let it grow slowly as I don't bake with it every week. But when I do, I use up to three cups of it at a time. You can make pancakes, bread, pizza dough, the uses are endless. There are several very good sites on modified recipes to use sourdough starter with. Get started today and catch your yeast because sourdough bread is coming up in a future post! *wink* There was a reason for this post!
Please feel free to leave comments or ask questions below!
 
Enjoy!
 
Steph

Friday, November 8, 2013

Vinegar Pie

Had to happen. Though when tasting this pie it was the right taste the texture didn't come out quite right. It was my fault though so maybe you may have better luck with it. I will have to try it again because I don't like defeat. I believe I didn't whip up the butter and sugar together enough. I also believe I should have beaten the eggs in one at a time and added the vinegar last. The texture was grainy and it wasn't puffed up enough by my way of thinking. It you try this let me know how you make out. I am really interested in how it comes out for you. Matter of fact I would appreciate the input.
 
The origin comes from the lack of lemons and other fruits during the 1930s. The Amish wanted to come up with something that looked like creamy lemony pie.
 
Vinegar Pie
1 disk My Homemade Pie Dough (see previous posts)
1/2 cup (1 stick) butter
1 1/4 cup sugar
2 tablespoons apple cider vinegar
3 large eggs
1 teaspoon vanilla extract (see previous post)
Pre-heat oven 350 degrees
 
In a large bowl, blend the butter and sugar until light and fluffy, about 2 minutes, stirring vigorously with a fork. Add the vinegar, eggs, and vanilla. Whisk vigorously for 1 full minute until the mixture is creamy and smooth. Pour into the unbaked pie crust. Bake until a butter knife inserted in the center comes out clean about 45 minutes. the pie will be a golden brown when done, over baking will cause cracks in the top. Cool before serving.

As I have said in a previous post these pies come from The Amish Cook's Baking Book by Lovina Eicher with Kevin Williams which I got from the local library. Since I have been trying to save money and making things myself instead of buying them in the store, I have been trying these easy simple pies. Baking shouldn't be a mystery and should be easy so we can all enjoy the fruits of our efforts. The wow factor from our family doesn't hurt our baking ego either!

Please leave any comments or questions below.

Enjoy!

Steph
www.webdees.com
www.etsy.com/shop/deesshoppe

Thursday, November 7, 2013

Homemade Vanilla Extract

Vanilla...oh what a beautiful scent and essential for most baking. Since we are all trying to save money where we can, vanilla is a good place to start. What is up with the price of pure vanilla extract? What is the size of the bottle 1/2 oz.? For how much money? I haven't bought vanilla extract in years and years. Now here is the trick to get the vanilla bean cheap....have lots of friends that bake too? Get together and get yourselves some vanilla bean from +Amazon.com and split it up between you all. That way you keep your cost down and everyone benefits! Start yourself up a spice club! Buy bulk and split it up! I share with someone at work and it works well. Back to the task at hand.
 
Get your stuff together:
 
Mason Jar
Vanilla Bean (Madagascar is what I use)
Vodka (any cheap brand)
 
Simple yes?
 
Split a couple of beans lengthwise and chop up. Fill your mason jar with cheap vodka and add the vanilla bean. Cap and shake once a day or so for a couple of weeks till you get a deep brown color. There, you are done! Use as usual.
This is a quart jar...that's a lot of Vanilla Extract!
 
As you use it and it gets low leave the bean in but add some more and add more vodka or start another jar when the first is getting low. Don't toss the old bean, just add to it. Keep in a dark place or place in a paper bag. Your vanilla extract doesn't like light. Guess that is why the store bought stuff is always in a brown bottle! You will never have to worry about having enough Vanilla while you are busy with your baking! You may want to try your hand at homemade Vanilla ice cream! Real Vanilla bean! I miss those little dark specks in my ice cream. Always wondered what happened to them...so much is artificial these days in the store. You can also get some Epson salts and infuse with vanilla bean, dress up the jar and give as a gift as a relaxing vanilla soak! So much for so little money.
 
Please do leave any comments or questions below. I would love to hear from you!
 
Enjoy!
 
Steph
 

Wednesday, November 6, 2013

Amish Homemade Buttermilk Pie

I promised a recipe for that homemade buttermilk so I decided to try the Homemade Buttermilk Pie from the same book from a previous blog. You will need the crust from Crust Recipe (follow link) for this pie. I had one ball left and it rolled out as I promised...beautifully. I did some searching on the web for these recipes and noted that they are indeed there but I also noticed that they go by names that most wouldn't even think of looking for as in BobAndy Pie named after a pair of prized gelding horses! Enough of that. You came for this recipe. We will try the BobAndy pie another day...
 

Homemade Buttermilk Pie
 
1 disk My Homemade Pie Dough (see above)
1/2 Cup (1 stick) butter, softened
1 cup fresh buttermilk
3 large eggs
1 1/2 cup sugar
1 tablespoon all-purpose flour
1 teaspoon ground nutmeg
 
Prepare your pie plate with your dough.
Pre-heat over 350 degrees.
In a large bowl, beat together the butter, buttermilk, eggs sugar and flour with a whisk. pour the filling into the unbaked piecrust. Sprinkle the top with the nutmeg. Bake until pie turns a golden brown color and pie is firm, about 45 minutes. Store any leftovers in a sealed cake safe. The pie will keep for about 2 days.
 
Mine took about 15 minutes longer. It puffed up before it would firm up.
 
What I love about these recipes is the simplicity. Nothing fancy but all goodness. Anyone can put one of them together in no time for any occasion. I put this one together before work. It is like a custard. You will not believe how so few ingredients can make something so yummy!
 
Please leave your comments below. They are most welcome.
 
Enjoy!
 
Steph


Tuesday, November 5, 2013

Fool Proof Pie Crust and Chocolate Chip Pie!

I love the library! The internet is great for searching things out but some things just don't beat the local library. You can find more of the obscure there and old as well. I found a book called @The Amish Cook's Baking Book by Lovina Eicher with Kevin Williams. I wanted to try some new recipes for the upcoming holidays. I think I found the perfect pie dough! I also found a wealth of great recipes I would like to share as I make them.   
 
I have been baking as long as I can remember. I used to spend more weekends that I can remember at my Nana's and we would bake and cook and crochet till past 1 in the morning. Ah the memories. Even with all that baking I can never make a decent pie crust that didn't give me a hissy fit rolling it out and putting it in the pan. I actually would dread making it for fear it would rip and tear which it often did. I used the two piece of wax paper technique and the roll on the pin way always broke up and a lot of patching was involved. May be the reason I don't make a lot of pies even though I don't eat cake as a rule, there is always time for pie! I was totally amaze how this dough rolled out without any accouterments that I am not dreading making my pumpkin and coconut cream pies this year! I do want to make one note here first before you may substitute one of the ingredients. The lard. Seems like a nasty word. I have talked with others and there is nothing like a crust made with lard so before you substitute, which I know you are itching to do, give it a try. Pie is not a diet food and you have to let your hair down a little ever once in a while. I do not know if substituting it will make the same crust. I used @Armour Manteca lard which is readily available in the grocery store. Try the Mexican aisle.
Just do me a favor and try it the way it says and then make your choice if you want to compare it with using another substitute. I, for one, will not mess with perfection! So here it is.
 
 
My Homemade Pie Dough
(from The Amish Cook's Baking Book) 
Makes 3 single 9-inch crusts
 
3 cups all-purpose flour
1 teaspoon salt
1 cup lard
1 large egg
1/3 cup cold water
1 tablespoon apple cider vinegar
 
In a large bowl, combine the flour and salt. Stir to blend. Add the lard and rub it into the flour with your fingertips until the mixture resembles coarse crumbs. Add the egg, water, and vinegar and stir with a fork until the dry ingredients are moistened. Form the dough into a ball and divide that into 1 balls. Form a ball into a disk and roll it out to a 1/8-inch thickness on a floured surface.
 
Fit the dough into a 9-inch pie pan and trim the edges to a 1-inch overhang. Fold the dough under and crimp the edges. If not using now, form the remaining 2 balls of dough in to disks, place each in a resealable plastic bag and freeze for up to 3 months.
 
And there you have it. Here is the recipe for the chocolate pie. Very simple and simply the best.
 
Chocolate Chip Pie
Makes one 9-inch pie
 
1 disk of @My Homemade Pie Dough
1 cup sugar
1/2 cup all-purpose flour
2 large eggs
1/2 cup melted butter
1 1/2 cups semisweet chocolate chips
1 teaspoon vanilla extract
 
Preheat the oven to 350 degrees and prepare your crust in your pie plate.
 
In a large bowl, combine the sugar and flour; stir in eggs and butter until the batter is well-blended and smooth. Add the chocolate chips and vanilla extract; mix until smooth and the chocolate chips are evenly distributed. pour the mixture into the unbaked pie shell. Bake at 350 degrees F until golden brown, 40-45 minutes. Cool on a wire rack or window sill until the pie is firm, about 45 minutes. Store any leftovers in a sealed cake safe. The pie will keep for about 5 days.


And there it is. So simple, few ingredients and the best I have ever tasted! If you are a chocalcoholic this is the pie for you! The crust just melts in your mouth! The filling is so heavenly.
 
Let me know if you try this and if you get the same results as I did. I did use one of the other crust for my Beef Pot Pie! One disk made two 6inch deep dish pies!

 Perfection!
 I am off now to have another piece of pie!
 
Enjoy!
 
Steph