Saturday, October 18, 2014

Pumpkin Pie from the Pumpkin to the Pie!

Hello all! I have posted this before last year so I thought since it is that time of year again I would post again. Hope you don't mind. The only difference really is that I grew the pumpkin myself this year!

 Been a great summer and a productive one at that. Now is the time to reap! There is something to be said about making a homemade pie. I don't mean assembling one from frozen pie crust and canned fruit either! I remember once I was cooking down a pumpkin and someone said why bother? That is too much trouble! Why don't you just go buy a can and be done with it? Well  for the most part doing it yourself is better if you ask me. Not processed, no additives just pure goodness. Who doesn't want that? Besides, if you grew it yourself from some free seeds and you get a great crop you are also saving money as well! This is what I grew this year!
It's called a Crookneck pumpkin. I am sure there are other names for it but that is what I know it as. I had bought one last year and saved the seeds and planted them this year. I have a few others ready for picking in the garden still and bigger than this one! What is great about these is that the skin is thin and easy to peel. The long neck is all solid. The bulbous end has the seeds like a regular orange type pumpkin.
Neck is solid.


Peeled neck part.

Just scoop out the seeds like you usually do.Save the seeds for next year!!
I peeled and cubed the neck portion but the round part I just sliced with the skin on as it is not so easy to peel the round part. Place on cookie sheets and bake 350 degrees for about an hour or so till soft.
Let cool so it is easier to handle. Now we have to puree it. I use a blender. You can use a food processor or a potato masher if you wish, just so it is smooth.

Peeling the slices is a breeze once it is cooked. I do NOT recommend boiling pumpkin. It adds unwanted moisture to your puree. Baking is by far the easiest and it frees you up to do other things in the meantime.

Ok so now we have our puree. Need to make up your pie crust. I use the foolproof one from this blog but here is the recipe again so you don't have to go look for it. 

My Homemade Pie Dough
(from The Amish Cook's Baking Book) 
Makes 3 single 9-inch crusts
3 cups all-purpose flour
1 teaspoon salt
1 cup lard
1 large egg
1/3 cup cold water
1 tablespoon apple cider vinegar
In a large bowl, combine the flour and salt. Stir to blend. Add the lard and rub it into the flour with your fingertips until the mixture resembles coarse crumbs. Add the egg, water, and vinegar and stir with a fork until the dry ingredients are moistened. Form the dough into a ball and divide that into 1 balls. Form a ball into a disk and roll it out to a 1/8-inch thickness on a floured surface.
Fit the dough into a 9-inch pie pan and trim the edges to a 1-inch overhang. Fold the dough under and crimp the edges. If not using now, form the remaining 2 balls of dough in to disks, place each in a resealable plastic bag and freeze for up to 3 months.

By far this is the best pie crust I have ever used. I highly recommend it  as it comes out the same every time! A no brainer for sure!

Now onto the pumpkin filling. I have been using this recipe for over 30 years. It's actually a custard really. 

Pumpkin Pie Filling
Makes two pies

 3 cups of pumpkin, canned or fresh pureed
1 cup light brown sugar
1 cup of white sugar
2 tablespoons of molasses
1/4 tsp. powdered cloves
1 tbsp. cinnamon
1 tsp. ground ginger
1 tsp. salt
4 eggs slightly beaten
2 cups of scalded milk
(heat till bubbles form around edge then cool)
2-9 inch unbaked pie shells

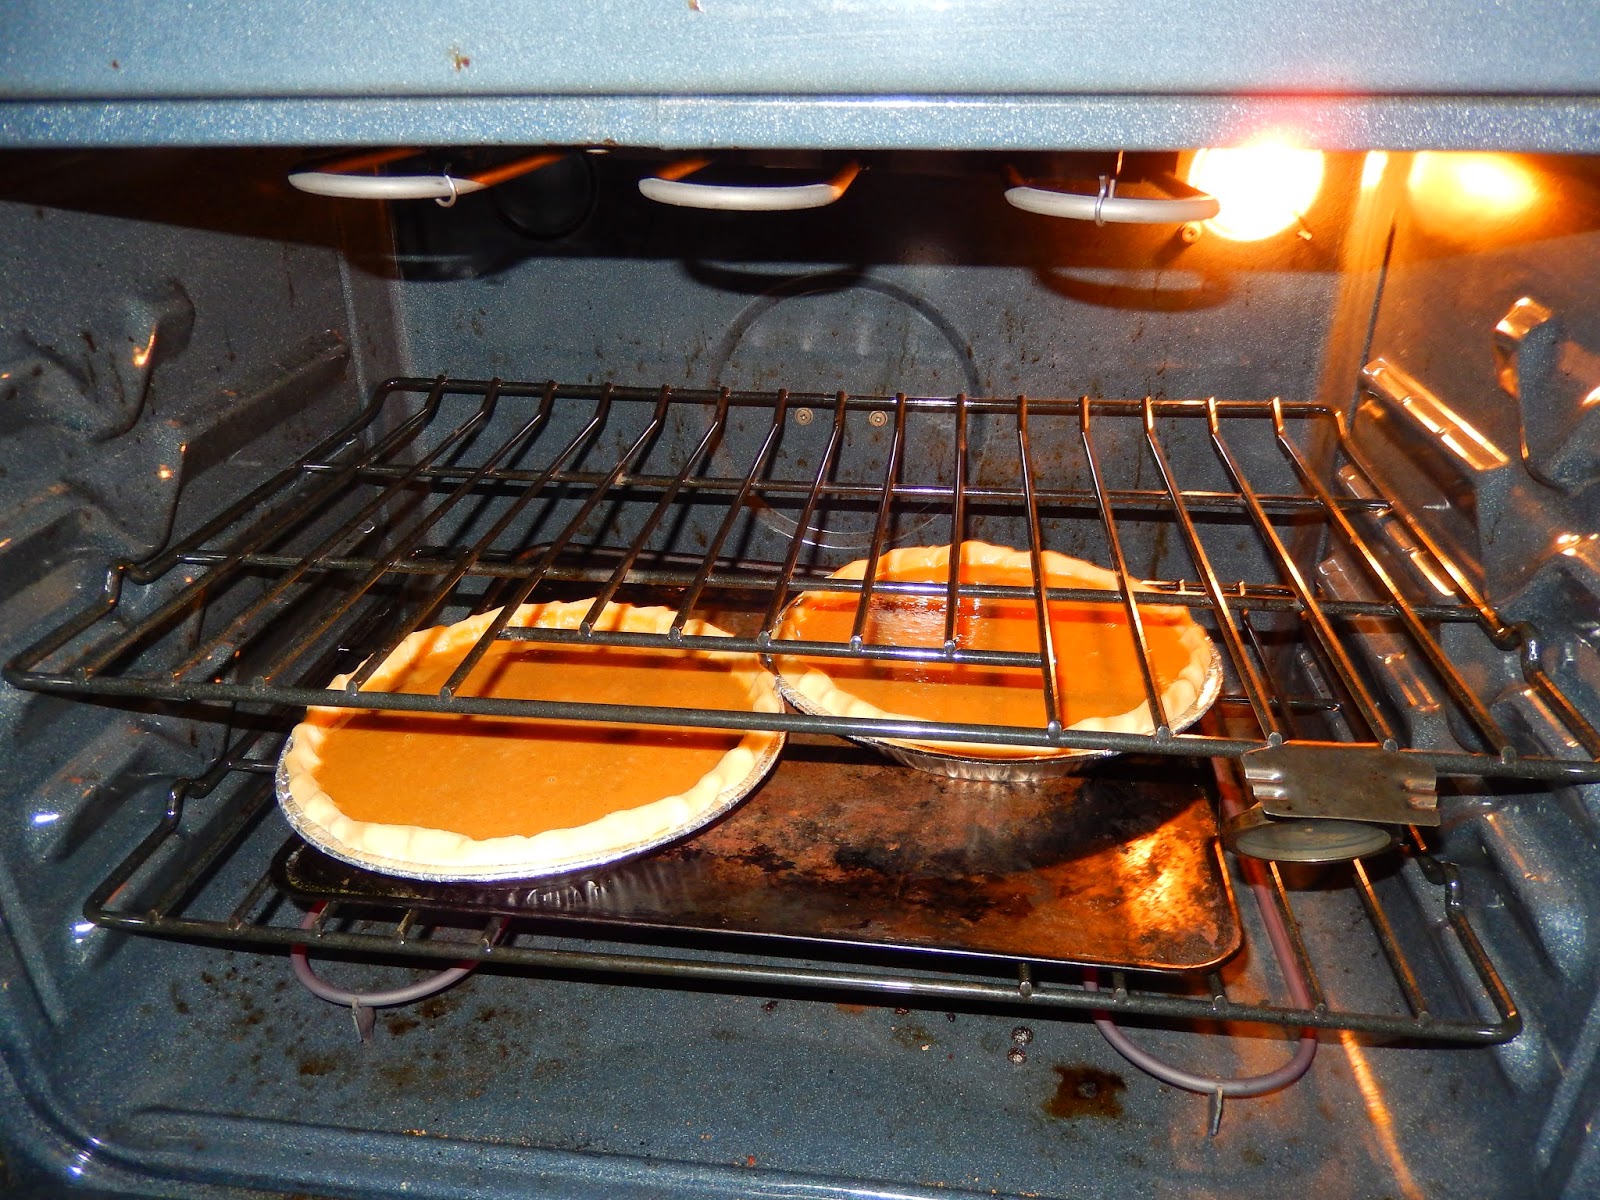
Combine all the ingredients mixing well. Pre-heat oven to 450 degrees. Bake at 450 for 10 minutes then reduce heat to 375 degrees for approx. 40 minutes or until knife inserted comes out clean. Cool and serve. You can top with whipped cream if you wish. Makes two delicious pies!


I know that this isn't something you can do in an hour. But you can prepare for making it ahead of time. You can cook the pumpkin one day and make the pies another. The crust freezes rather nicely and the puree does too. And you get boasting rights! You made a pie! A real pie from scratch and not just assembled! Be proud and raise your mixing spoon high! WoooHooo!

Enjoy!
Stephanie DelGrippo
www.webdees.com


Friday, September 19, 2014

Stuffed Peppers...Tis the season!

You really can't pass up a freebie. I was offered half a box of yellow bell peppers. What? Say no? NOT! On the way home my mind was already humming as to what to do with them. A plan started to formulate. I could always stuff them with plain stuffing or get creative. A step back here....plain stuffing, homemade that is, is the best by itself. I have used it to stuff my Thanksgiving turkeys as long as I can remember. It really is a very simple thing that can be used for many different things and as here for stuffing peppers! I will get to that recipe in a moment. Ok I thought I have a little homemade tomato sauce in the fridge. I have rice....need bread for the stuffing so off to the store. I had to go anyway. Got a loaf of cheap bread while there and there was a good sale on some ground chuck. More for the mix! Back to the home turf!

Basic Stuffing:

1/2 pound butter or margarine
Loaf of bread
2-3 stalks of celery diced
1 medium onion diced  
Fresh or dried parsley
salt and pepper to taste
2 eggs

Need a big bowl for mixing and large fry pan for sauteing the onions and celery. In the big bowl break up the bread. 
In the fry pan melt the butter or margarine and add celery and onions. Cook till translucent.


Chop parsley add to bread and add the onion and celery mix as well. As I had gotten some ground beef I cooked up a pound of it and drained and added that to the mix too.

Had some cooked rice...tossed that in.
So we have our mix all together. The stuffing, beef and rice. You can add additional spices if you like. Garlic maybe or some added black pepper and salt to taste. Fresh or dried rosemary for sure. Gives it a great taste. Now we need to core our peppers.
Aren't they pretty? Pre-heat oven 350 degrees. Stuff them up and place in pan. Drizzle a little olive oil or what you may have on hand. I also drizzled some leftover tomato sauce on them as well. Bake approx 40 minutes. Remove and eat up!


There are so many variations you can do. Add cheese. Add broccoli. Add ham. The sky is the limit! Let me know your favorite!
 
Enjoy!
 
Stephanie
www.webdees.com

Tuesday, September 16, 2014

Homemade Turkey Ham and More!

Ever wondered how it's made? We had an extra turkey, you know, shop so many times at a grocery store and get a free turkey? Well I had one and thought, hmmmm what can I do with this. I didn't wish to go down the traditional road so I had a plan. Let's see how far this turkey will go!
 
First, defrost. Seems silly but yup you got to make sure it is thoroughly defrosted from the get go. Sharpen your knives and begin by cutting off the drumsticks, thighs, wings with cutting off the tips and separating into two (a wing end and mini drum). Debone the thigh and put aside. Now don't be going and tossing the bones and scraps in the garbage! Get your soup pot ready with water, crack the bones and put them in the water. Include those wing tips too.
 
What you have left is the body with the breast still attached. Carefully remove the breast trying to keep it in one piece. Two is ok so don't worry about it. Dump the carcass and giblets and stuff into the soup pot. Let's start with the breast. Make a "soup" of about 1/4 cup of non-iodized salt, 1 tablespoon for each pound of breast, a cup of brown sugar and about two cups of water (or less, depends on container) mix well. Place the breasts into the mix and refrigerate for a week. Take out, drain and add cold water and let sit for about 20 min and repeat. We want to leach out some of the salt. I did tie up the two breast together with cotton string to make it one piece. You can see the "lumps" the string made in the picture. At this point you can smoke it like I did before finishing off in the over at 350 degrees for about 40-50 min. depending on size. This is what you get.

Turkey Ham! And delicious too! We have been making sandwiches with it.
 
Ok back to the rest of the remains..chuckling! Ok get a pan spray with non stick, place the drumsticks and wing parts, paint with your favorite BBQ sauce or like I used, Sweet Baby Ray's Buffalo glaze. Bake in oven covered 350 degrees for about 50 minutes then remove cover cook additional 10-15. Yummmy! Easy enough.
 
Ok, we started with one turkey and have a turkey ham and buffalo turkey so far. Let's go for broke. You have the pot with all the bones and carcass in it boiling away. I tossed in a few declawed and split chicken paws for extra flavor and smoothness but you don't have to. Skim off the scum as you go along. I like to toss in some bay leaf while it's cooking as well. After about an hour of cooking remove from heat strain and return broth to pot. Pick off what ever meat you can find and toss that back in too. Remember those two thighs you deboned? Cube them up and add them as well. Add chopped celery, carrots and onions. Add fresh parsley if you got it and maybe a sprig of fresh rosemary or use the dried stuff. Add some salt and pepper to taste. Got some fresh tomatoes on hand from the garden? Dice up toss them in too! Cook till all is tender. You can add a can of cream of celery soup if you like then add pastina or orzo or alphabet pasta, cook till done and serve up! If you let it sit and cool down it will thicken on it's own.
 
Out of one turkey you got three different type meals and then some. It's a lot of food for sure. Talk about stretching a dollar. I just love making George cry! If you have any questions please let me know. I will be happy to answer them. I hope you enjoyed this post! With Thanksgiving coming and the deals that will be offered you can pick up an additional turkey for a reasonable price. Happy Cooking!
 
 
Enjoy!
Stephanie


Saturday, June 28, 2014

Quick Homemade Pasta

Well I found myself in need of some pasta for clams and pasta but the cupboard was bare! This would normally place most in the car for the store or opt for making something else. But why? Got flour, salt, egg and a little olive oil and you have some pasta! I know most don't have time for this sort of thing. And it's true, during the week it would not be time friendly but a weekend is a different story. As it happens it's Saturday and I think I spent more time searching the cabinet than it took to whip up the dough! Besides, homemade is tastier and at least I know what is in it. 

   I have been making my own off and on for years and years. I do have a crank pasta maker which I have used, but only if I am going to make a lot and freeze most of it for later use. Today I only wanted to make enough for the meal. If that is the case then this is for you! Another scenario would be you want to wow someone or someones without having to do the crank thing. Granted, this pasta will be a thicker when cooked than if you used a pasta maker but hey! It's homemade! Believe me you will not find the quality or the yum factor in the store. Not any that I know at least. So let's begin.

2-3 cups unbleached flour
1 cup + water (I used the whey from cheese making)
2 tablespoon of Olive Oil
Tablespoon or slightly less of salt
1 large egg

You can omit the egg which I have once in a while but 1 egg isn't going to kill you and you really should have the vitamin K and protein that eggs provide. Kinda of cancels out the Cholesterol factor if you ask me.The egg adds a richness to the pasta but let me know if you think so too. Ok picture time. If you have any problems following this let me know and I will make adjustments. 
Make a well in your flour.


Add salt


Olive oil


Egg


Whey or water


Mix with fork


Start pulling the flour from the edges. Add more liquid if you think you won't have enough. You can always add more flour if you put too much.
Keep pulling and mixing till you can gather into a ball.


Kneed adding additional flour till some what stiff but still workable. If you were to use a pasta machine it should be stiff but since we are not a little on the soft side is better. Let rest for a little bit, about 5 minutes.

Liberally dust with flour

Roll out with a rolling pin into a rectangle constantly dusting with flour and turning over. Then we are going to fold it over still dusting so it doesn't stick together.

Take a knife and cut into strips. The width is up to you. Thin or thick is fine.
Now you want to undo them and lay them full length sprinkled with lots of flour.

Let dry out for a while turning them carefully over if you wish to aid in drying out some. Boil lots of salted water and cook till tender....top with your favorite sauce or gravy like my family calls tomato sauce!

Enjoy!
Stephanie

www.webdees.com


Saturday, June 7, 2014

Baked Bacon Wrapped Chicken

This a pretty much straight forward recipe for chicken. I uses the buttermilk I have posted in a previous post. I am a big advocate of soaking chicken in buttermilk to make it tender and juicy. Since soaking using buttermilk you tend to use a lot of it and it goes down the drain afterwards. You can not use it again without the HIGH risk of contamination of unwanted bacteria from the meat. At $2.99 a quart, buttermilk tends to be expensive. Therefore making your own is the wisest choice. What you purchase in the store is cultured to begin with why not just keep it going. This is the wisest course of action. I also use buttermilk as a key culture in making my cheeses so I save money there as well. Buttermilk is the mesophilic culture needed to make many different cheeses.

On to this recipe. Marinade your chicken (any parts) for at least half hour to several hours. Spray or oil a baking pan. Shake each piece from the buttermilk. I used my apple smoked homemade bacon and wrapped each piece. Sprinkle some garlic powder and some pepper over the pieces bake at 350 degrees for about an hour or more till done. Time will depend on what type of chicken parts you use. The legs took about and hour and 10 minutes. I do not recommend salting the chicken due to using bacon. If the bacon is salty you will over salt.
The juicy chicken coupled with the smokey flavor of the bacon is truly mouth watering! Another thing, I love plain Greek yogurt on my chicken when eating it. Don't knock it till you try it! It is especially good on fried chicken. Plain yogurt is a great substitute for sour cream and better for you! You can also find my homemade yogurt in my blog. Any questions or comments are always welcome! Let me know how yours came out!

Enjoy!
Steph

www.webdees.com

Thursday, May 29, 2014

Cheddar Cheese and More

Been busy making more cheese lately. Cherri-Knoll Greenhouse in PA. is a great source of great milk for making cheese.


I decided to branch out and try cheddar cheese. Got the recipe from http://www.culturesforhealth.com/how-to-make-cheddar-cheese-recipe . I am in the drying stage at the moment.

I used two gallons of milk for this. It made a nice wheel. The hard part is waiting a month or two before trying it. The other problem is I won't know if it turned out ok till then. Making any more at this point wouldn't be a good idea till I know if it turns out. I am still waiting for the provolone I had made. I am getting itchy to try that soon as well. I did make a great wheel of Colby last week.

Pretty isn't it? This I will try soon. Supposedly you don't have to wait for this to age too much. I have it under wraps in my fridge to age just a few weeks.

I am out of mozzarella so with the remaining milk this week I will make more of that. It is my fav to make. I just love the stretching part don't you? You will find that recipe in one of my other blogs. Let me know if you have any questions or comments. They are always welcomed!

Enjoy!
Stephanie

www.webdees.com

Sunday, May 25, 2014

Homemade Cleanser

There will be no pictures for this. Who wants to see a dirty bathroom? Well, I went to clean the "water closet" and couldn't find any cleanser! The commercial market has all those fancy cleaner just spray on and wipe off. I am an old fashion type and love my cleanser type of person. Yes, it takes more to rinse off but I just can't get away from it. Sorry, it is what it is. Back to my issue. I am out. Now what. Stare at it and hope it goes away? Wait for another day when I can get to the store to buy more? Heck no. Think. Ok. I have other stuff which none by themselves will work. *light bulb goes off* Off to the kitchen! Yes, the kitchen. Grabbed a bowl and put a generous portion of baking soda, many spritzes of Clorox cleaner (use bleach instead if not available) and a squirt of Dawn dish washing liquid (great for cutting grease). Off to the bathroom. It made the fixtures shine, cut though the gunk, and did a better job than my favorite cleanser with less product! Best part, less scrubbing! Just what I like! And rinsing was minimal!

Sometimes we just have to take a step back and use some of our grey matter. I hope you find this helpful. It worked for me. Using it took half the time that I usually take cleaning the bathroom. I believe it was the NOT need to rinse so much. Please try it and let me know how you made out!

Enjoy!
Stephanie

www.webdees.com

Saturday, May 24, 2014

Miss me?

Did you miss me? I have been making the same thing over again and like I have mentioned before I didn't think it was news worthy to repeat. I just wanted to wish everyone a great and safe holiday weekend. I did make some homemade pizza with my homemade mozzarella. Here it is!
I did do something different on the crust though. Instead of water I used buttermilk. You know it came out rather well! Full bodied, crunchy on the outside, tender on the inside. Also made a nice Sicilian type crust. 

I always believe in trying something new! Any questions let me know!

Enjoy
Stephanie
www.webdees.com

Sunday, May 4, 2014

Ricotta Cheese Cake with homemade Ricotta

Haven't been posting lately since I have been making the same thing over again and I didn't think anyone would be appreciative seeing the same thing over and over again. Lately I have been making a lot of cheese and of course there is lots of ricotta being made from the whey. I decided to make a ricotta cheesecake! It came out very well if I may say so. Here is what I did.
 
About 2-3 pounds of Ricotta
2/3 cups of sugar
1/3 cup of flour
6 eggs
1/8 salt
2 tsp. of orange zest
2 tsp. orange extract
2 tsp. vanilla extract
Ground or fresh ground nutmeg


Pre-Heat oven 300 degrees.
Beat ricotta smooth, add flour, sugar, salt, extracts, zest. Beat your eggs in one at a time till well incorporated. Butter and flour a spring form pan. Pour in batter in pan. Bake for 1 1/2 hours or until golden and knife comes out clean. Chill before serving. Garnish with orange slices if you want.
As you can see it didn't take long for us to dig in! I suspect they the whole cake won't make the end of the weekend! I am sure you can use store bought ricotta but I love making use of everything so I made my own! It certainly a bonus from making cheese. Any questions let me know!
 
 
Enjoy!
Stephanie