Thursday, November 28, 2013

Homemade Kahlua!

I thought with the upcoming holidays this would be something different. I was talking with my daughter and sent her the recipe, so I thought, why not? I like to share! Kahlua can be very expensive. Since my purpose is to save money and still enjoy the good things in life, here it is. This would make a great gift for someone who enjoys Kahlua or for you to enjoy on a cold day in your coffee with family and friends. A little disclaimer first. Please drink responsibly and don't drink and drive. I want everyone to stay safe please!
 
Homemade Kahlua
 
2 cups water
2 cups white sugar
1/2 cup dry instant coffee (fresh)
1/2 chopped vanilla bean
1 1/2 cups vodka
 
Boil water and sugar until dissolved. Turn off heat. Slowly add dry instant coffee and continue stirring. Add a chopped vanilla bean to the vodka, then combine the cooled sugar syrup and coffee solution with the vodka. cover tightly and shake vigorously each day for 3 weeks. Strain and filter. You can use cheese cloth to filter. Yields about 4 cups. I usually double the recipe when I make it.
After filtering you can add a couple of teaspoonful of glycerin if you want. It thickens the mixture. You can also substitute rum for the vodka for Tia Maria. Store in dark bottles and keep away from heat and light. I keep the mixture in a brown paper bag during the shaking period.
 
Bet you didn't think it was so easy! This has been my point all along. You don't have to shell out lots of money for some of the finer points in life. You can make it yourself. It is just a little prep time and mostly just wait time. I am positive your family and friends will not believe you made it yourself. It's called the "WOW" factor.
 
Enjoy!
 
Steph

Wednesday, November 27, 2013

Pumpkin Pie!

A friend of mine Cyndi from Facebook asked for my recipe for pumpkin pie. I originally got it from +Reader's Digest Back to Basics book I acquired in 1981. I love this book and have referenced it often over the years. Most of the recipes you find for pumpkin pie call for evaporated milk or cream and such. Not this one. Just simple ingredients which nowadays is a good thing. Use the crust I have posted HERE and you will have a lovely pie in no time!
 
Pumpkin Pie
 
3 cups pumpkin, canned or steamed and pureed
1 cup light brown sugar
1 cup white sugar
2 tablespoons Molasses
1/4 teaspoon powdered cloves
1 tablespoon cinnamon
1 tablespoon ground ginger
1 teaspoon salt
4 eggs, slightly beaten
2 cups of scalded milk
 
If canned pumpkin is used, cook until thick. I always use fresh. I bake it till softened and use my food processor. Don't want to boil! That would add extra water and you don't want that. I used a Crookneck pumpkin or gourd which they really are . The neck of it is solid and the skin is extremely easy to peel with a vegetable peeler. If you use a regular pumpkin the easiest way is to cut it open, scrap the seeds and strings out and cut into chunks with the skin on and bake. After it has softened and cooled slice off the rind before pureeing.  
(photo from /woodridgehomestead.com)
 
Combine ingredients and mix thoroughly. Pour mixture into pie shells. Bake at 450 degrees for 10 minutes. Reduce heat to 375 degrees, and bake 40 minutes more or until knife inserted between center and edge comes out clean. Cool. Can serve topped with whipped cream, pecan halves, or a drizzle of caramel syrup. Makes two 9 -inch pies.
 
I like mine deep dished. Here is a picture of mine.
 
 
Like I mentioned I have been using this recipe since the early 80's and it has never failed me. Now that I have this great crust I have been using, it comes out like a dream.
 
Let me know how yours comes out! You can leave me a comment or questions below.
 
Enjoy!
 
Steph


Tuesday, November 26, 2013

Buttermilk Pie Variation...Add Coconut for an easy Coconut Pie!

Just a quick note on the Buttermilk Pie recipe I had posted. I added two tablespoons of my homemade vanilla into the recipe and sprinkled a cup of fresh shredded coconut on top before baking. Oh my word! Easier than my traditional recipe for Coconut Custard pie! And as usually that crust comes out the same every time! I do hope everyone has a great Thanksgiving. I will try to post a few more things before Thanksgiving but I am busy getting prepared as I know you all are doing as well. I do hope you are going to try some of the things I have posted. If you do please let me know how it came out and if you have any questions or comments. I would love to hear from you!
 
Enjoy!
 
Steph
 

Saturday, November 23, 2013

Quick Homemade Buttermilk Biscuits for Eggs Benedict..All Homemade!

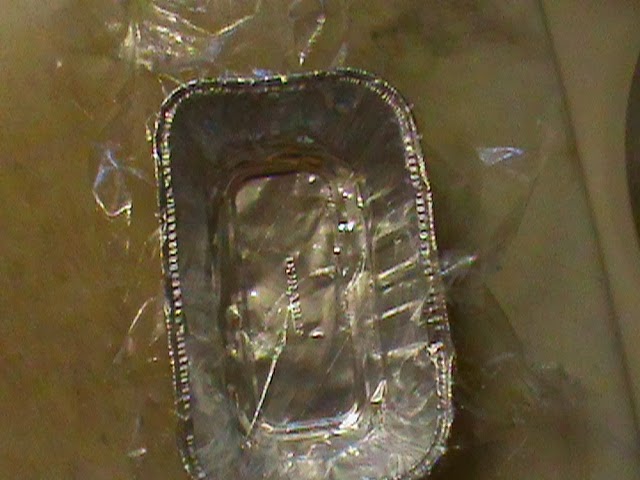
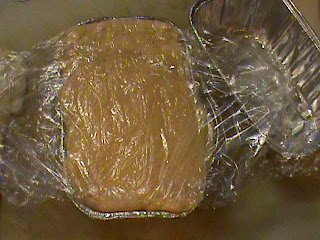
This recipe calls for your homemade buttermilk from a previous post. Thought I would post this as I am making breakfast this morning and didn't have any bread or rolls. I plan to fry up some of my homemade Canadian bacon, homemade hollandaise sauce and poach some eggs...sound like eggs benedict! Well why not! I'll toss some cheese on top and have a go at it! Like I have mentioned in previous posts making things on your own you not only save on money but you can make lots of delicious things with what you have made that you wouldn't otherwise consider because you would have to spend precious dollars for special ingredients. In this case buttermilk biscuits...Canadian bacon, packaged hollandaise sauce mix...pricey. My Canadian bacon is on my website in the recipe section and you can find it here. Which is very inexpensive to make. I keep a ready supply in my freeze for the weekends. At a $1.88-$1.99 a pound it's a steal! Let's start with the biscuits.
 
Bowl
Tablespoon
Large glass
Lard (or substitute shortening like Crisco)
1 teaspoon Salt
1 tablespoon Baking Powder
Flour
1 cup Buttermilk

 
Heap 4 tablespoons of lard (lard makes a better tasting biscuit!) or shortening add 1 teaspoon of salt, 1 tablespoon of baking powder. Add 3 cups of flour and mix with your hand rubbing the lard into the flour till you get a course meal like feel. Add 1 cup of buttermilk and mix with your spoon till it pulls together. Try not to over mix. Drop onto a lightly floured surface and pat out to about 1/2"-3/4 inch thickness.
Cut out your biscuits out with your glass.

Gather the remnants and pat out again, cut till you have nothing left. I just pat out a little round with the last of it.
Place on a greased baking sheet and bake 350 degrees for about 1/2 hour or until lightly golden on top. Makes about 8. You can freeze what you don't immediately use and just toast up when you need one!
 
Fry up your Canadian Bacon. I do mine in a little water. Helps leach out some of salt in the meat.

Now for the Hollandaise sauce.
4 Egg Yokes
2 tablespoon cold water
1 stick UN-Salted butter just melted
Cayenne pepper
Black pepper
salt
2 tablespoon Fresh lemon juice (can substitute bottled if you are short a lemon)
 
Melt butter and set aside. Make yourself a double boiler as shown here.


Bring water up to a simmer. Now tell everyone not to bother you for a bit as if you stop at this point it will not turn out creamy! Believe me. I have had it happen on more than one occasion (it happened making this for you today as I was trying to get some pictures in! Had to start over!) so after that I got prepared! It helps if you have everything handy and within reach at this point. Add egg yolks and water into the pan then place on the simmering water and whisk till it just starts to thicken,
Slowly add the butter
whisking constantly till it is all incorporated and continue to cook till it is a nice creamy consistency. Like a soft pudding. Immediately remove from heat and add your lemon juice, salt and pepper to taste and a dash of Cayenne pepper and there you got it!
Now onto poaching your eggs. Make sure they are fresh. I add more water to my pan I used for the double boiler water and add a dash of plain white vinegar. It helps to keep the egg together when you place, not drop the eggs into the water. Crack the egg and as close as you can just slide the eggs into the water. I am doing two at a time.
Let cook about 3-4 minutes. You don't want to make the yolks hard. So watch them. Remove with slotted spoon dip in fresh water (to remove the vinegar) and then onto your halved biscuits,
add slice of Canadian bacon,
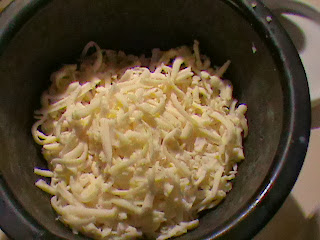
some finely sliced Mozzarella
and spoon on your Hollandaise sauce.
Oh to die for! And you made it!
 
Hollandaise sauce is great on vegetables or baked potato. I hope you enjoy your breakfast as I know I will mine. Let me know how yours came out. I would love to hear from you!
 
Enjoy
 
Steph

Thursday, November 21, 2013

Homemade Gnocchi

Hi everyone! Sorry haven't posted anything lately. Been a little busy with other stuff. Tonight I made homemade cheese gnocchi. They are Italian dumplings. They come in two different types, cheese and potato. I made the cheese kind using Ricotta. We are having gnocchi for our Thanksgiving dinner as a side dish and we also had it for dinner tonight. I purposely made a lot to freeze. Let's begin.

32 oz Ricotta
1 tablespoon salt
garlic powder
1 cup Grated cheese (Romano or Parmigiano)
6 eggs
4+ cups Flour
 
Beat the eggs, ricotta, salt, garlic powder together. Add grated cheese and a couple of cups of flour. Gradually add more flour till you can make a ball that is not sticky.
Refrigerate for several hours or store overnight in fridge and finish the next night. Cut off a handful and roll into long rolls about 3/4 inch thick. Cut in no more than 1/2 inch sections.

At this point you can either pop them into boiling water seasoned with salt or spread on a wax paper lined cookie sheets and freeze before placing them in a bag for storage in the freezer. Cook them for about 10 min after they start to float to the top and scoop out with slotted spoon. They will be considerably bigger as they puff up. Top with melted butter, salt, pepper and grated cheese or your favorite tomato sauce and mozzarella.
Serve with garlic bread and a nice salad! If this is too much for you by all means cut the recipe in half in half. There is nothing like fresh!
 
Enjoy!
 
Steph

Monday, November 18, 2013

Homemade American Cheese

I found this recipe on the web a while back. It was for American cheese. I think it is more of a Velveeta type cheese. I made it this week to go on my cauliflower for Thanksgiving next week. The original recipe called for straight Colby cheese but I found that you can use a Colby Jack combo just as well. I also have tried grated swiss which was quite tasty. This cheese will melt nicely. Great for sauces, grilled cheese or on crackers. Let's get started.

1 1/2 teaspoons unflavored gelatin
1 tablespoon water
12 ounces (about 3 cups) of Colby or cheese of choice shredded
1 tablespoon whole dry milk powder
1 teaspoon salt
1/8 teaspoon cream of tarter
1/2 cup + two tablespoons whole milk
 
Line a 5x4 inch aluminum loaf pan, the mini ones, with plastic wrap. 

Sprinkle the gelatin over the water in a small cup and let sit until the gelatin softens, about 5 min. Combine the cheese, salt, dry milk and cream of tartar in a food processor and give it a few pulses. Heat the milk to boiling and whisk in the gelatin till dissolved. With the processor on pour the hot milk into the cheese and process till smooth, scraping down the sides as needed. About a minute or so.
Now immediately transfer to your lined pan quickly. Pack it in and smooth down to expel any air holes. A spatula works well here. Then fold over the wrap over the cheese smoothing the cheese further and then refrigerate.
Several hours later you can slice up and use.

The original recipe said not to use non-fat dry milk but I couldn't find it in the store. I did use the non-fat and I don't think it came out bad. If I do find it I will try it with it instead and see what the difference it makes. I also buy the cheese already shredded to facilitate the processing. I picked up the cheese on sale for $1.22-$1.50 a package. I make this in two batches as the same time. Three packs of cheese will makes two loafs. So much cheaper to make than buying market Velveeta. And you get bragging rights!
 
Enjoy!
 
Steph
 

Friday, November 15, 2013

Pizza with Sourdough Crust!

Your sourdough starter should be really happy by now so here is another use for it. I just love not having to run out to the store for yeast because I am out. With a starter going I never run out. With a little planning you can have your crust and eat it too! Pizza is great comfort food as far as I am concerned. I did my term paper for English in college on pizza. My teacher told us to remember your audience when picking our topics. So I did. He was Italian and what Italian doesn't love pizza! Needless to say I aced it! LOL! Didn't hurt bringing in samples either! So you get up in the morning and say to yourself what should I make for dinner that night. Hmmm how about some easy pizza? Great! Let's begin!
Sourdough starter
Flour
Salt
Olive oil
can of diced tomatoes
Mozzarella cheese
Basil
Garlic powder
Topping of choice
 
In the morning take at least two cups of starter in a bowl. Add about a tablespoon of salt, three tablespoons of olive oil and you can add some fresh chopped rosemary and sage if you like to jazz it up. Mix in some flour till it pulls from the sides without sticking. Roll it around in the bowl turning and punching. This way you don't have to mess up your counter with kneading and having flour flying all over the place. Put a clean dish towel over the bowl and place in a draft free area and off to work we go. That night when you get home punch it down and take out of the bowl and give it a little kneading and pat down on your pizza plate or cookie sheet that has been coated with spray or olive oil. You can sprinkle corn meal too for easy release. I was out of cornmeal so I used Pam.  
Let it sit and get happy while we prepare our toppings. We are going to be making a classic Margherita pizza with a Andouille sausage topping to satisfy the meat eater in the house. I like to slice my sausage partial frozen so I get thin even slices. I used Johnsonville Andouille Sausage.

Open a 8 oz. can of diced tomatoes, drained and put in a bowl. Add a couple tablespoons of olive oil, salt to taste, basil, garlic powder and stir up. Set aside. Grate your mozzarella into a bowl and set that aside.

By this time your crust is puffing up a little. Pre-heat your oven to 400 degrees. Put your rack as low as you can in your oven. I usually use a pizza stone or 9-6x6 unglazed quarry tiles but for this I am assuming you don't have something like that and I want anyone to make this. If you are using a stone put that on your rack while the oven is coming up to temp. You want it to be the same temp as the oven. Back to the crust. Spread your tomatoes over the crust.
Add the cheese, about 1/2 pound...I love cheese!
Now your topping...
Looking good! Ding! Your oven is hot! Pop that puppy into the oven. Set timer for 30 min. You will have to keep an eye on it after 20 minutes depending if you are using a stone or not. The crust should be turning a golden brown and the cheese should start to be bubbly. Keep checking till it is nice and even. We don't want the cheese to turn brown.
Now here is the trick for a crunchy crust. Take it out and loosen from the pan with a little shake and shake right onto the rack. The pie should have enough body so it will sit ok on the rack. Let it bake for another 10 minutes and remove back to your pan.
Oh doesn't that look yummy!

There you have it! Let cool a bit before you slice it up. This type of pizza is great as there isn't any sauce to prepare so it is quick and easy. Your family will think you ordered out! Don't forget to feed your starter! Keep it happy and it will keep you happy! Let me know if you have any questions or comments below. I will be happy to answer you.

Ejoy!

Steph
www.webdees.com
www.etsy.com/shop/deesshoppe


Thursday, November 14, 2013

Homemade Sausage from Country Style Ribs!

I just love my food processor. There are so many uses for one than you would think. For instance, want some ground beef for tacos but don't have anything but some cubed beef for stew? Well just partial freeze it and process away and wa-la! Ground beef! I have worn one out just because I love to use it. Here is another use. Let's make some loose sausage or sausage patties! How much is the store bought stuff now. $3.58 on sale? Guess it depends where you live. Any a hoo here is what you do! Now remember you can't make a bad batch just different flavors. It may be fun to try different  things for different tastes. Pork Country ribs go on sale for what? $1.49 a pound? Maybe a little more? Still under $3.00 right? Get out your food processor and lets get started.
Start with partial frozen ribs. Makes it easier for the processor and you cubing it. Trim off the meat, fat and all. Toss the bones into a small pot with some carrot, onion, celery and then a few noodles for a little spot of soup. We don't waste anything here. You would not believe the amount of fat that is in sausage. That is where all the grease comes from, and the flavor though I have found that some of the store bought is mostly fat and little meat! If you have visited my website www.webdees.com and saw in the recipe section on how to make homemade Canadian bacon and saved the trimmed fat off that then bring it out. If you saved it in the freezer that is great. It will cut into cubes frozen. If you look on the web there are so many different recipes for making sausage. Different spices and additions. Try this to start and what I do is I take a little and fry it up, taste it and adjust to taste. Get creative.

Ok you will need:
Pork partial frozen (country style ribs work well) One healthy package will do 3-4 lbs
2 tablespoon black pepper
1 cup of fresh sage or 1-2 tablespoon of ground sage (I like extra)
4 cloves of garlic
salt
4 tablespoon of cold water
1 cup of pork fat (fat back can be used but I have not had luck with it. If you use it don't add any salt till you test it first! Or you can just make a lean sausage. It may be a little dry.)
 
The above is the basic. You can add fresh onion, brown sugar, nutmeg, fennel, Broccoli Rabe, combination of all or beer even. Cayenne, crushed red pepper to spice it up...It is up to you. I have tried so many combinations and they were all good! Now with your pork and fat all cubed up give it a good round in your processor with your spices so it is all chopped up with no chunks and well mixed.
Looks like this. Let it sit for a bit, about 15 minutes or longer to let all the spices just combine with the meat and try a test fry.
Just try a little with any addition if you are not sure and try it out first, add what you think it needs and try again. I didn't say this was a science! Besides, if you don't make it your own you can't gloat! I add some Turmeric to mine as it has great value and taste! When you get it how you like it make patties and freeze on a sheet. Provided you haven't eaten it all! LOL!
Pop into the freezer then take them out and place them into a bag so you can pull out how many you want at any given time.
There you have it. I made these with 3 tablespoon of brown sugar for a nice breakfast treat. Form into logs and put in a bun with your homemade sauerkraut from a previous post! If you have any questions or comments please leave them below. And please, if you try this out let me know how yours came out!

Enjoy!

Steph
www.webdees.com
www.etsy.com/shop/deesshoppe